
Trendy transitions are important for YouTube vlogs. They help keep viewers engaged and improve the visual appeal of the content. Have you ever come across a video that held your interest with its fluid style? This is the moment when transitions are at their best. Explore our blog to see how to improve transitions and impress your audience!
CapCut desktop video editor, a video editing software, makes it easy for creators to add beautiful transitions with just a few clicks. No matter your skill level, the CapCut desktop video editor gives you the tools to upgrade your videos easily. It’s designed for both beginners and skilled creators. Are you looking to upgrade your content?
YouTube vlogs rely on transitions for multiple key functions:
Engagement: They keep the audience engaged by creating a continuous flow from one scene to the next. This avoids sudden interruptions that could confuse or distract the audience.
Narrative Building: Transitions connect various sections of the video. They help to tell the story and guide viewers smoothly through the content.
Pacing: They determine the vlog's rhythm, amplifying emotional appeal and ensuring viewers stay interested.
Tools like the CapCut desktop video editor help creators use transitions easily. Video background removal and text-to-speech are features that empower both beginners and experienced editors. They allow users to enhance their videos without needing deep technical knowledge. This accessibility enables every creator to create excellent content that attracts their audience.
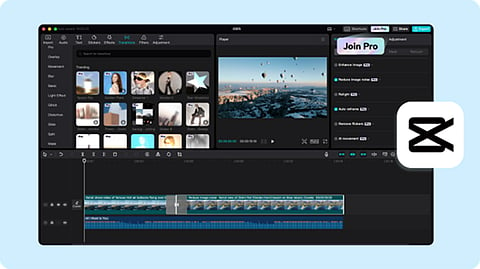
CapCut desktop video editor provides many ready-made transitions like swipe, spin, and zoom effects, making video editing for vlogs better. You can customize these transitions to fit different types of vlogs, like travel, lifestyle, and tutorials. Let's take a look at them:
The swipe transition slides one scene out while sliding another in. It results in a fluid change that comes across as natural. You can use it in vlogs to change locations or topics. For example, when you finish discussing a meal and change locations, a swipe can link those experiences together. This keeps the audience interested and makes the video look better and more fun to watch.
A spin transition is an entertaining method to change scenes in videos. It brings energy and keeps the audience engaged. This method is effective for lively content, such as travel videos. As the camera whirls, it evokes a sense of journey and excitement. Viewers become engaged in the experience. The fast shift catches the eye and brings energy to the video. By using this transition, you can increase the fun of visiting new locations.
The zoom transition is an easy effect that creates a sense of depth between scenes. It uses zooming in and out to make a smooth change from one scene to another. This technique captures the viewer's attention and creates a more vibrant video experience. It is very common in tutorial and lifestyle videos, as it improves the storytelling aspect. Using this transition can improve the overall professionalism and polish of your videos.
CapCut desktop video editor is a fantastic option for vlog transitions, with numerous benefits to offer:
Ease of Use: The intuitive design helps everyone edit with ease, regardless of their experience.
Free Access: CapCut is entirely free to use, with no secret fees or watermarks, so that every creator can access it easily.
Trendy Effects: It offers many trendy effects and transitions that make videos unique and grab viewers' attention.
CapCut also offers a video background remover to keep your content focused. Plus, it includes text-to-speech for easy voiceovers. Customization options let users modify transitions to suit the specific style of their vlogs. This freedom allows creators to share their ideas without restrictions. With its strong features and free availability, CapCut is great for anyone who wants to upgrade their video content with ease.
Open the CapCut desktop video editor and initiate a new project for importing clips. Use the plus (+) button to find and select media files from your device. After making your selection, click on Add to transfer them to your project. Position your clips on the timeline for easy transitions between them.
Open the CapCut desktop video editor and begin a new project to include transitions. Upload your video clips and organize them on the timeline. Find the small box located between the two clips; click on it to access the transitions menu. Review the choices and pick the transition that suits you best. Drag the slider to set the duration, either speeding it up or slowing it down. This ensures a continuous flow from one clip to another. Once you feel good about it, hit the checkmark to finalize. Watch your video to confirm that everything appears smooth before you finish and export it.
To differentiate your project, include effects in your transitions. You can use easy fades or wipes. Further, it could be helpful to provide text that describes each scene. These small adjustments can add a personal flair to your work. It helps you develop a style that shows who you are.
To download your video from CapCut, first, tap the export button found in the top right corner. Change the resolution to align with your video quality, which is usually 1080p. Use MP4 format and h.264 codecs to achieve the best results. After you export your video, head to YouTube to upload it. Just select the upload option and tweak the settings as you like.
Using trendy transitions in your YouTube vlogs can take your storytelling to the next level. You can use CapCut's easy tools to add smooth transitions, which will make your videos more engaging. Plus, the video background remover gives a neat appearance, and the text-to-speech tool makes your message clearer. These upgrades can make your content more noticeable. Don’t overlook these fantastic features. Start using the CapCut desktop video editor and transform your vlogs today. Make videos that fascinate your audience and show off your unique flair!
